Introduction :
Making chicken fingers in the oven is one of the easiest ways to enjoy a crispy and delicious meal without deep frying. Whether you are preparing a quick dinner for your family, looking for a healthier alternative, or simply craving crunchy chicken, this method is perfect.
This guide will take you through the entire process step by step. You will learn about the best ingredients to use, how to coat the chicken for extra crispiness, and the correct way to bake them for the best texture. You will also find useful tips on how to serve them, how to store leftovers, and how to make them even healthier.
By following this simple method, you can make crispy and flavorful chicken fingers in the oven with minimal effort. Let’s get started.
Why Oven-Baked Chicken Fingers Are a Great Choice
The Health Benefits of Oven-Baked Chicken Fingers
Many people love chicken fingers, but frying them in oil can make them high in fat and calories. Baking them in the oven is a much better option. It allows you to enjoy crispy chicken without the extra grease. By using the right coating, you can still achieve a crunchy texture while keeping them healthier.
When you bake instead of fry, you also reduce the mess in the kitchen. There is no need for a deep fryer or dealing with leftover oil. Everything cooks evenly in the oven, and clean-up is much easier.
Why This Chicken Fingers Recipe is Better Than Fried
The secret to crispy chicken fingers in the oven is in the breading. Using panko breadcrumbs instead of regular breadcrumbs makes a big difference. Panko is lighter and airier, which helps create a crispier coating. Adding Parmesan cheese also enhances the flavor while giving the coating a slight crunch.
Another important step is baking at a high temperature. Setting the oven to four hundred degrees Fahrenheit allows the coating to turn golden brown and crispy. A wire rack placed on top of a baking sheet also helps air circulate around the chicken, which prevents sogginess.
How to Get the Crispiest Chicken Fingers in the Oven
Chicken fingers are a favorite among kids and adults alike. They are easy to eat, fun to dip in different sauces, and pair well with many side dishes. Since they can be stored and reheated easily, they are also a great option for meal prep. You can make a big batch and enjoy them throughout the week.
Another great advantage of this recipe is that it can be customized to different diets. You can use whole wheat breadcrumbs for added fiber, go for gluten-free alternatives, or even use almond flour for a low-carb version.
In the next section, you will find a detailed list of ingredients and step-by-step instructions to make the crispiest chicken fingers in the oven.
Ingredients and Preparation for Homemade Chicken Fingers
Best Ingredients for Crispy Chicken Fingers in the Oven
Before you start cooking, gather the following ingredients.
- One and a half pounds of chicken tenderloins
- One cup of panko breadcrumbs
- Half a cup of grated Parmesan cheese
- One teaspoon of garlic powder
- One teaspoon of paprika
- Half a teaspoon of dried thyme
- Half a teaspoon of dried parsley
- Salt and black pepper to taste
- Two large eggs
- Two tablespoons of olive oil
How to Prepare the Chicken for Coating
Start by patting the chicken dry with a paper towel. This helps the breading stick better. If you are using whole chicken breasts, slice them into strips to create even-sized pieces.
Making the Crispy Coating
In a shallow dish, mix the panko breadcrumbs, Parmesan cheese, garlic powder, paprika, dried thyme, dried parsley, salt, and pepper. Stir everything together so that the seasonings are evenly distributed.
In another bowl, whisk the eggs with olive oil. This mixture will help the breadcrumbs stick to the chicken properly.
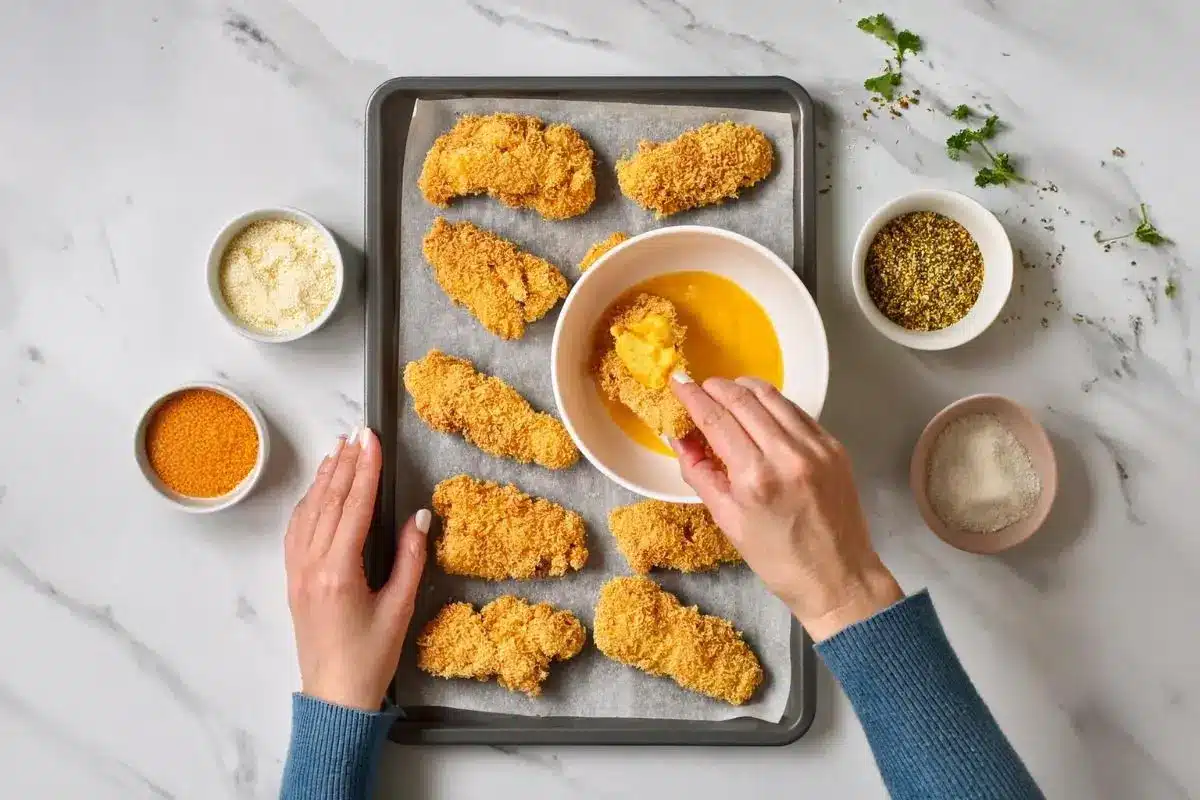
Coating the Chicken Properly
Dip each piece of chicken into the egg mixture, letting the excess drip off. Then, press it into the breadcrumb mixture, making sure it is fully coated. For an extra crispy layer, you can dip it back into the egg and then again into the breadcrumbs.
Place the coated chicken fingers on a parchment-lined baking sheet, leaving space between each piece. This helps them cook evenly and get crispy on all sides.
In the next section, you will learn how to bake them to golden perfection.
Baking Instructions for the Best Chicken Fingers
Making chicken fingers in the oven is simple, but following the right steps ensures they turn out crispy and flavorful. From preheating the oven to getting the perfect golden brown texture, each step plays an important role.
Preheating the Oven for Optimal Results
Setting the right oven temperature is key to getting a crispy coating. Preheat the oven to four hundred degrees Fahrenheit. This high heat helps the breadcrumbs turn golden and keeps the chicken moist on the inside.
If you want even crispier results, place a wire rack on top of a baking sheet. Lightly grease the rack with cooking spray to prevent sticking. The rack allows heat to circulate around the chicken, which helps it cook evenly. If you do not have a rack, lining the baking sheet with parchment paper also works well.
Baking the Chicken to Perfection
Once the oven is ready, arrange the coated chicken fingers on the prepared baking sheet. Make sure they are spaced apart so they cook evenly. If they are placed too close together, the coating may not crisp up properly.
Place the baking sheet in the oven and bake for ten minutes. After that, carefully flip each piece using tongs. Flipping ensures both sides develop an even crunch. Bake for another ten to twelve minutes or until they turn golden brown and reach an internal temperature of one hundred sixty-five degrees Fahrenheit.
To check if they are done, cut one piece in half. The meat should be fully cooked with no pink inside. If using a meat thermometer, insert it into the thickest part of the chicken to confirm it has reached the correct temperature.
Letting the Chicken Rest Before Serving
Once the chicken fingers are fully baked, remove them from the oven and let them sit for a few minutes before serving. Allowing them to rest helps the coating stay crisp while keeping the meat juicy. If you serve them immediately, the coating may soften slightly due to steam.
To keep them warm before serving, place them on a cooling rack instead of a plate. This prevents condensation from forming underneath, which can make them less crispy.
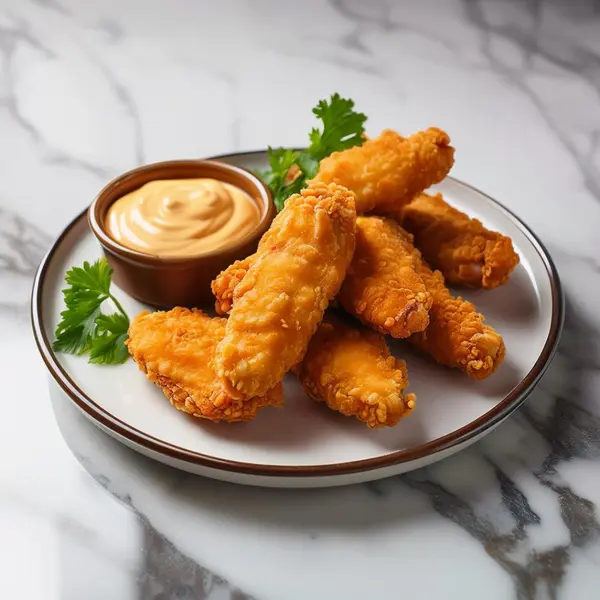
Serving Suggestions for a Complete Meal
Baked chicken fingers taste great on their own, but pairing them with a good dipping sauce makes them even better. Popular choices include honey mustard, ranch dressing, barbecue sauce, and spicy sriracha mayo. For a healthier option, try serving them with a yogurt-based dip or a side of fresh vegetables.
They also go well with a variety of side dishes. Serve them with sweet potato fries, a crisp salad, or mashed potatoes for a balanced meal. For a lighter option, pair them with steamed vegetables or quinoa.
With these baking techniques, it is easy to make crispy and flavorful chicken fingers in the oven. By following the right steps, you can enjoy a homemade version that tastes just as good as fried without the extra oil.
Serving Suggestions and Nutritional Information
Best Side Dishes for Chicken Fingers
There are many great side dishes to pair with chicken fingers. Some of the best options include:
- Sweet potato fries
- Mashed potatoes
- A crisp green salad
- Steamed vegetables
- Rice or quinoa
Dipping Sauces to Enhance Flavor
Chicken fingers taste even better when paired with a good dipping sauce. Some of the most popular choices include:
- Honey mustard
- Ranch dressing
- Spicy sriracha mayo
- Tangy barbecue sauce
- Garlic parmesan dip
Nutritional Breakdown per 100g
| Nutrient | Amount |
|---|---|
| Calories | 220 kcal |
| Protein | 23 g |
| Carbohydrates | 12 g |
| Fat | 8 g |
| Fiber | 1 g |
| Sodium | 450 mg |
| Cholesterol | 90 mg |
In the next section, you will find answers to common questions about making chicken fingers in the oven, along with storage and reheating tips.
FAQs and Storage Tips
Many people have questions about making chicken fingers in the oven, especially about keeping them crispy, storing leftovers, and reheating them properly. Below are answers to some of the most common concerns.
How to Keep Chicken Fingers Crispy After Baking
To keep the chicken fingers crispy, it is important to bake them at a high temperature. Using a wire rack on the baking sheet helps air circulate around them, which prevents the bottom from getting soggy. If you want even more crunch, lightly spray the breaded chicken with oil before baking. This helps create a golden crust without frying.
Another tip is to avoid stacking the chicken fingers after they are done. Letting them sit on a flat surface can cause steam to build up, making the coating soft. Instead, place them on a cooling rack and let them rest for a few minutes before serving.
Can You Make Chicken Fingers Gluten-Free
Yes, it is easy to make a gluten-free version by replacing regular breadcrumbs with gluten-free alternatives. Panko-style gluten-free breadcrumbs work best because they provide the same crispy texture. Almond flour is another option for those following a low-carb diet. If using almond flour, mix it with grated Parmesan cheese for extra crunch.
What’s the Best Way to Store Leftovers
Leftover chicken fingers should be stored properly to maintain their flavor and texture. Place them in an airtight container and store them in the refrigerator for up to three days. To prevent them from getting soggy, avoid stacking them directly on top of each other. Instead, place parchment paper between the layers.
If you need to store them for a longer period, freezing is the best option. First, arrange the baked chicken fingers in a single layer on a baking sheet and freeze for about an hour. Once they are firm, transfer them to a freezer-safe bag or container. This method prevents them from sticking together, making it easier to reheat only what you need.
How to Reheat Chicken Fingers Without Losing Crispiness
Reheating chicken fingers the right way is important to keep them crispy. The best method is to use an oven or an air fryer. Set the oven to three hundred seventy-five degrees Fahrenheit and place the chicken fingers on a baking sheet. Heat for five to ten minutes, flipping them halfway through. In an air fryer, set the temperature to three hundred seventy-five degrees Fahrenheit and heat for about four to six minutes.
Avoid microwaving them, as this tends to make the breading soft and chewy. If using a toaster oven, heat them at the same temperature as a regular oven for a few minutes.
For more details on storing chicken properly, check out these food storage guidelines at allrecipes. This will help ensure that leftovers remain safe to eat while maintaining their texture and flavor.
Chicken fingers are a great meal that can be enjoyed fresh or as leftovers. By following these tips, you can keep them crispy and delicious every time.
For more information on how to store cooked chicken safely, check out these food storage guidelines.
Conclusion :
Making chicken fingers in the oven is a simple and healthier way to enjoy this classic dish without deep frying. By using the right ingredients and techniques, you can achieve a crispy and flavorful coating while keeping the inside juicy and tender. Baking at a high temperature, using panko breadcrumbs, and flipping halfway through cooking all help create the perfect crunch.
One of the best things about this method is its versatility. You can customize the seasoning to match your taste, use different coatings for extra texture, or even make them gluten-free. They pair well with a variety of dipping sauces, from classic honey mustard to spicy sriracha mayo. Whether served as a main dish, in wraps, or as a snack, they are always a crowd-pleaser.
Another great advantage of this recipe is that it works well for meal prep. The chicken fingers can be stored in the refrigerator or freezer and reheated without losing their crispiness. This makes them a convenient option for busy days.
By following these simple steps, you can make crispy and delicious oven-baked chicken fingers anytime. Whether cooking for yourself or for family and friends, this easy recipe is sure to become a favorite.